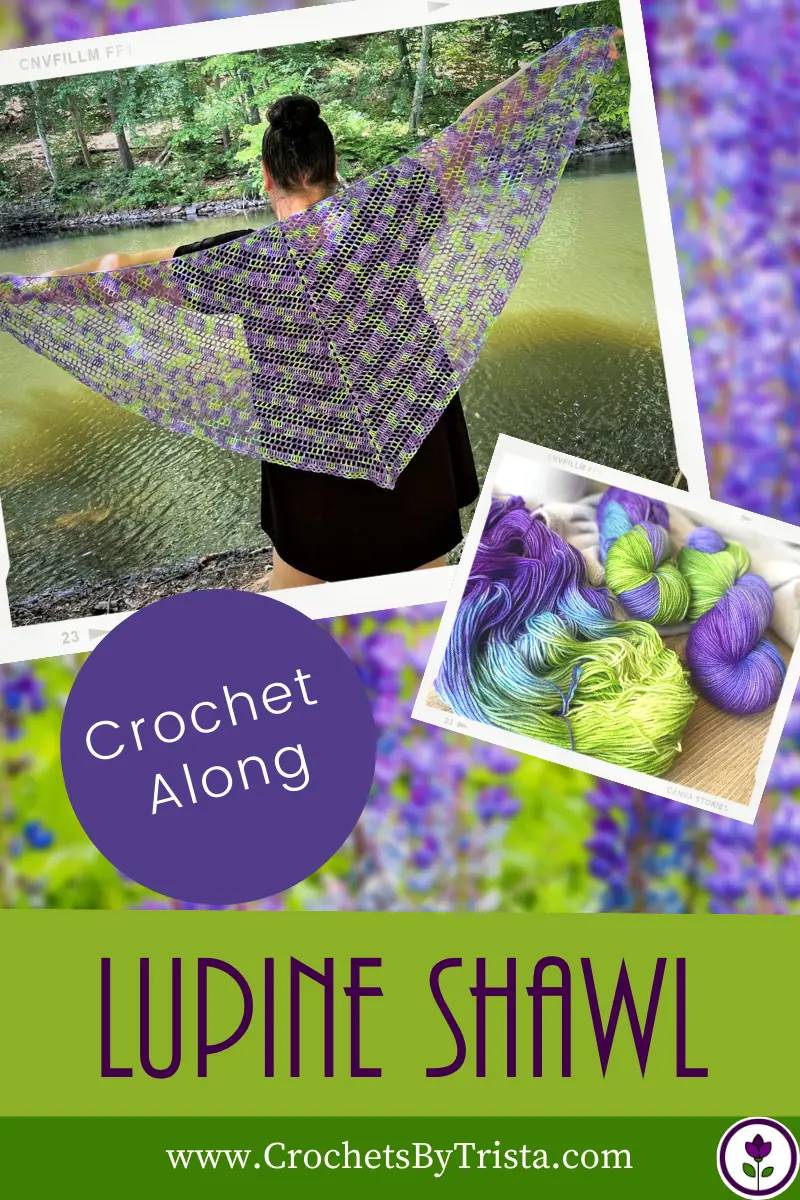
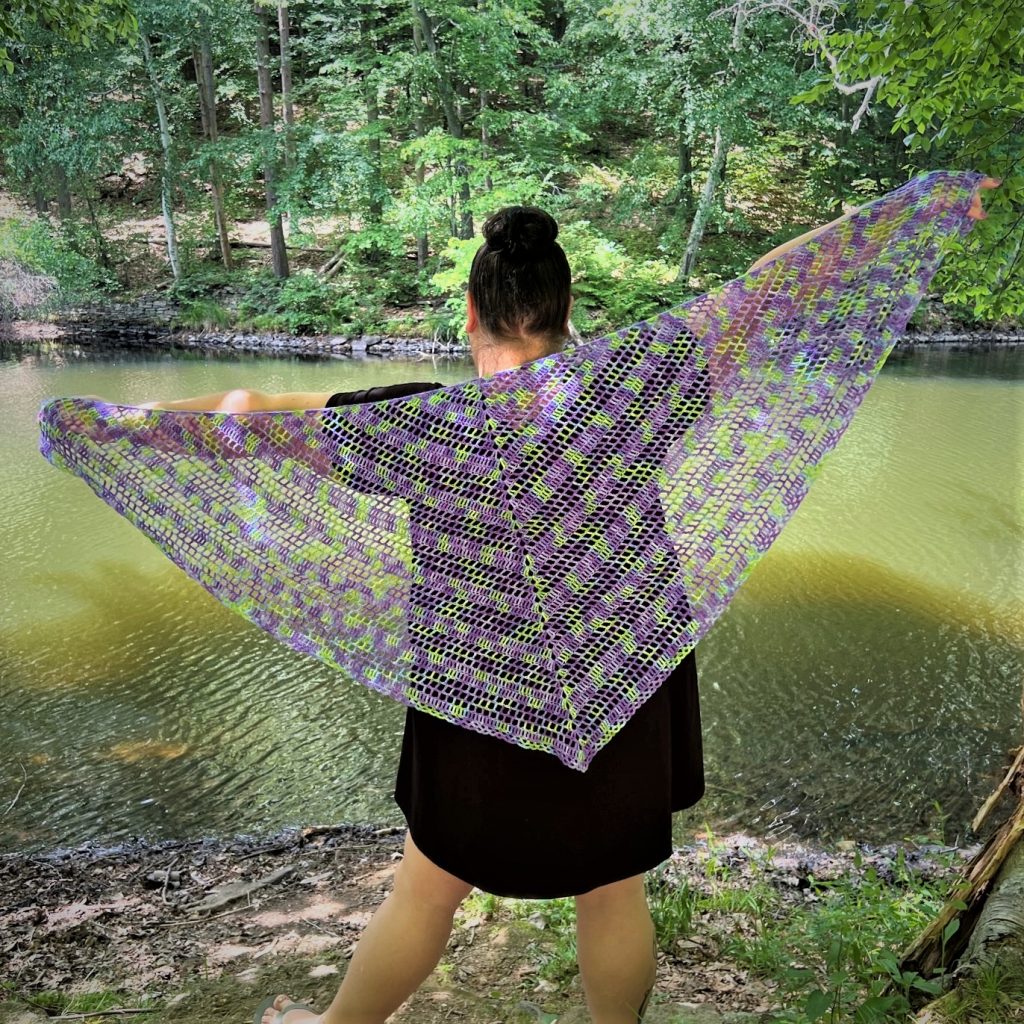
Welcome to the Lupine Shawl Crochet-Along! Over the next 7 posts we will be making the beautiful Lupine Shawl.
I’ve separated the Lupine Shawl into 6 parts so it is easy to follow along and you won’t be so overwhelmed with making it.
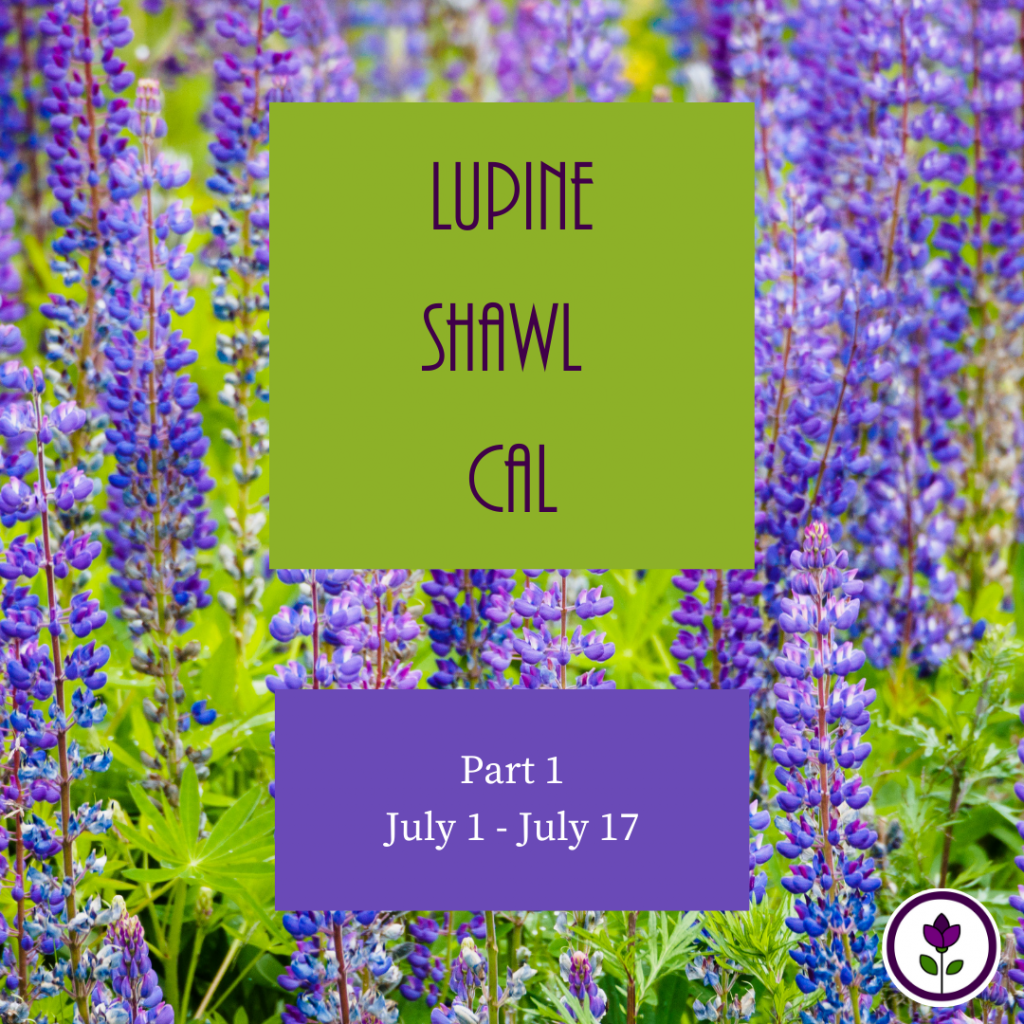
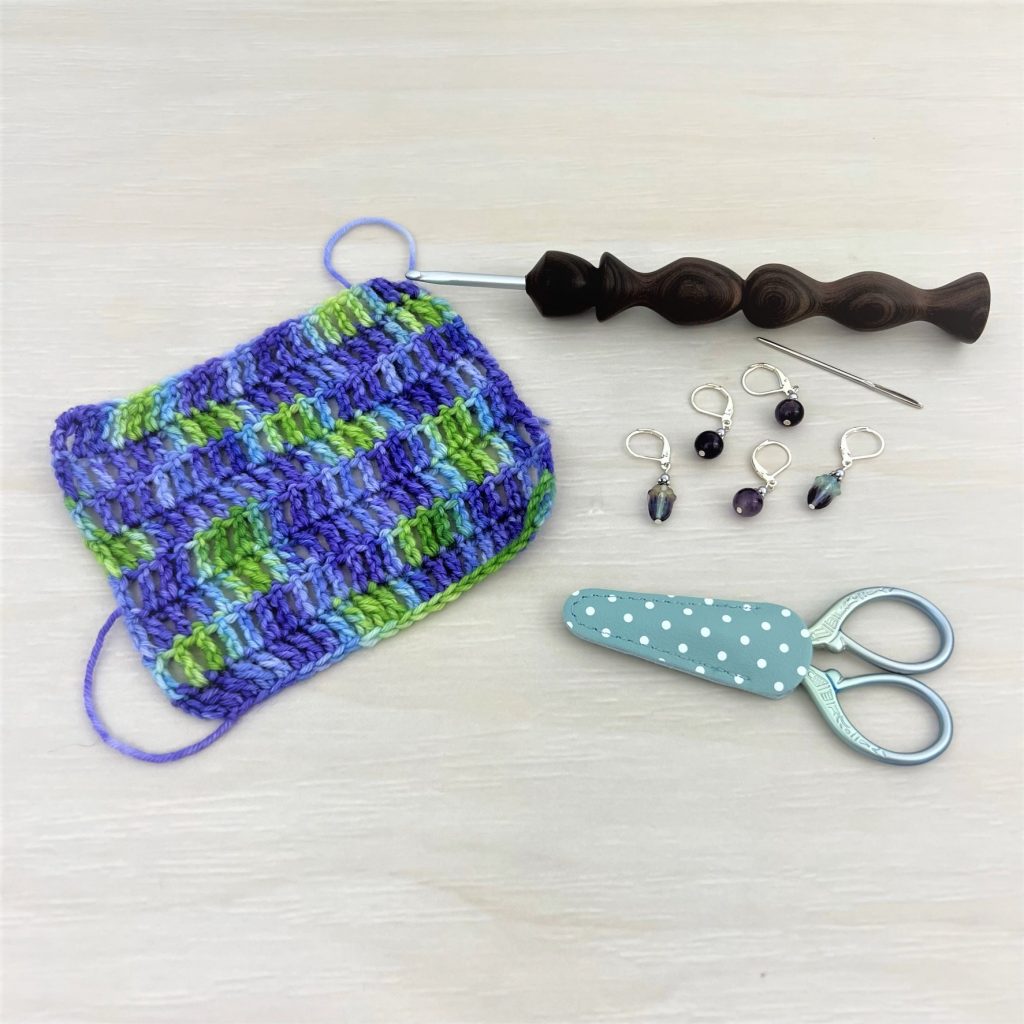
In Part 1 we will go over all the supplies and information you’ll need to make the Lupine for yourself, because this is a project that you’ll want to keep. I’ll also give you instructions on how to do your gauge swatch.
**Post contains affiliate links – which means if you make a purchase from the links below, I will get a small percentage of the sales at no additional cost to you**
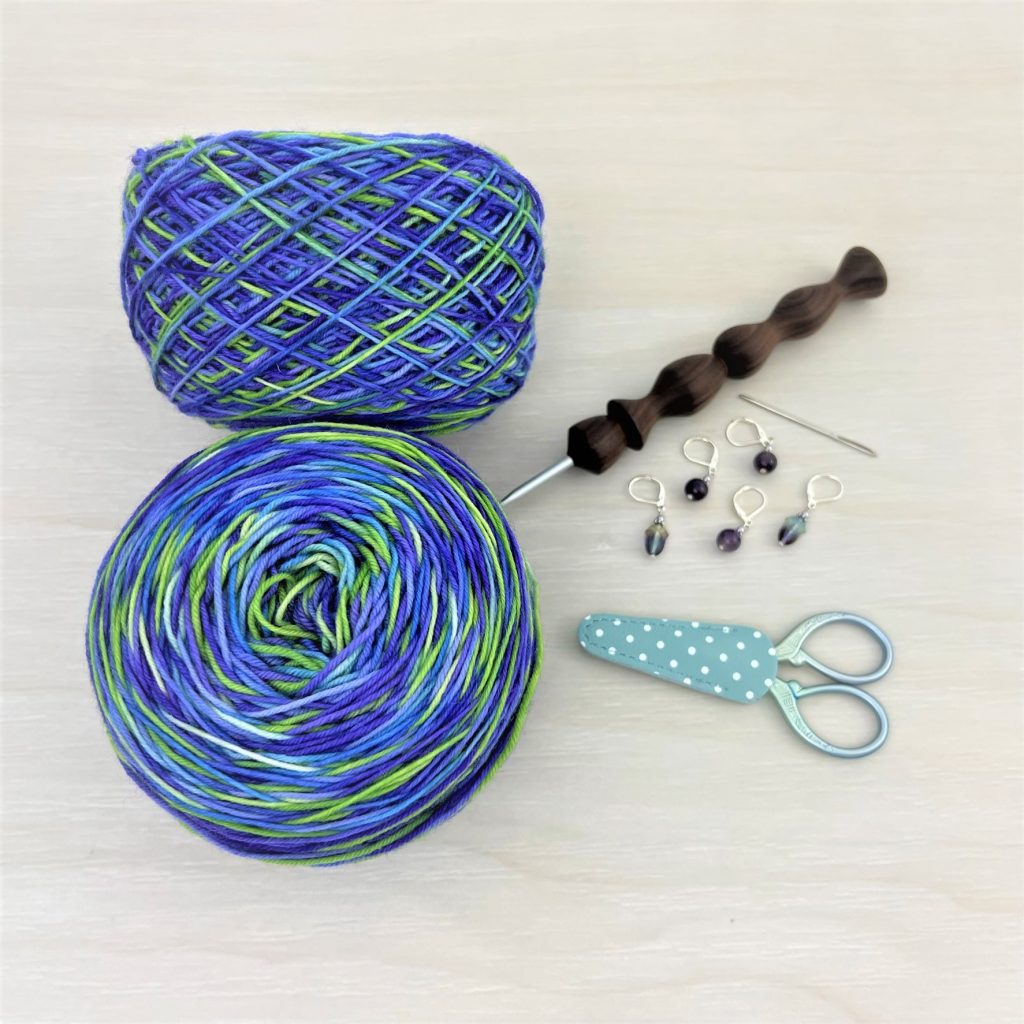
Supplies Needed
To make this beautiful triangle shawl you will need the following:
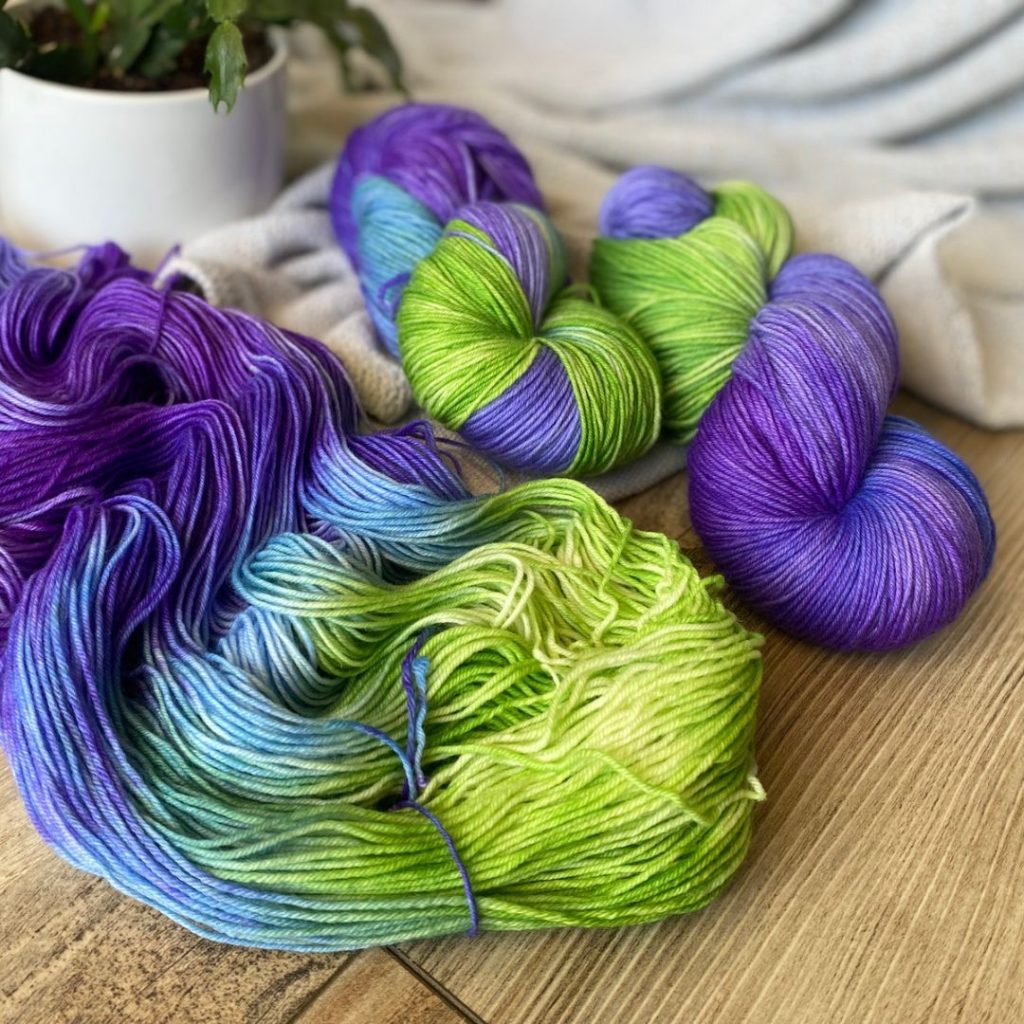
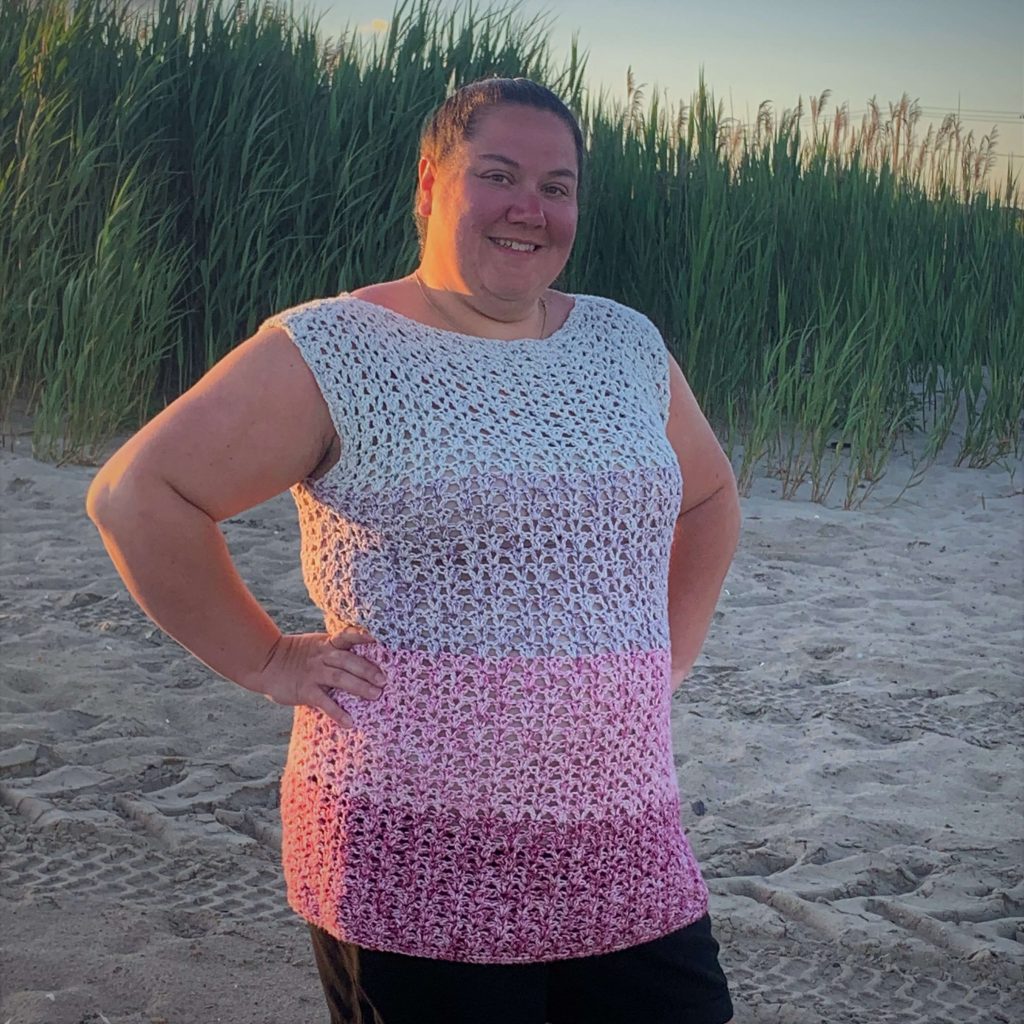
I worked with Joanna of High Desert Yarn on creating a special colorway specifically for this Crochet-Along. We threw so many ideas at each other. I think the end result is the perfect marriage of our ideas.
The Lupine Colorway gives me all the “summer” vibes. The purples, greens, and blues within the yarn make me think of fields of wildflowers along the road while taking a road-trip.
The Lupine Shawl used just a few stitches to make a wonder lacy summer shawl. They include the following:
Ch – Chain
MC – Magic Circle
Sc – Single Crochet
Sk – Skip
Sp(s) – Space(s)
St(s) – Stitch(es)
Str – Starting Treble Crochet
Tr – Treble Crochet
Stitch Definition:
Starting Treble Crochet – (also known as Long Chain Treble Crochet or Chainless Starting Treble Crochet.) Pull up your loop to the height of your usual Treble Crochet. Yarn over twice, insert into the 1st St, yarn over, pull through the Stitch, yarn over, pull through two loops on the hook, yarn over, pull through two loops on the hook yarn over, pull through the remaining two loops on your hook.
I’ve enjoyed using the Chainless Starting Double Crochet from Tamara Kelly of Moogly in the past and it can easily be used for a Starting Treble Crochet.
Finished Size
The finished size of the Lupine Shawl is:
Before Blocking – 60” wide x 30” tall After Blocking – 70″ wide x 35″ tall
Blocking your finished shawl helps open up the lace work and border. It looks just as nice without blocking.
Gauge
I had the following gauge when I made the Lupine Shawl:
20 Sts x 7 Rows of Tr = 4”
Swatch
Ch 35
Row 1.) Tr in 5th Ch from the hook (Ch4 counts as Tr) and each Ch across. (32)
Rows 2-10.) Turn, Str in first St, Tr in next St and St across. (32)
In the middle of the swatch you should have 20 Tr in 4″; 7 rows should also measure 4″.
By doing the gauge swatch you can get a little practice using the Str.
Your gauge doesn’t have to be EXACTLY the same. If it is slightly off, your final yardage and finished size will be different.
Pattern Notes
The following tips and information might be helpful when making your Lupine Shawl:
Written in US crochet terms.
Blocking finished shawl isn’t necessary but advised.
The Str can be substituted with a Ch 4.
A stitch count is provided at the end of each row.
I changed skeins every 5 rows to use the skeins evenly and to make any variations in the yarn to be less noticeable.
Part 2
Part 2 of the Lupine Shawl Crochet-Along is now available and we will cover the first section of the pattern.
I’d love to hear from you! Don’t hesitate to contact me. Let me know what you’re working on or designs you’d like to see in the future. Use the links above or email me at crochetsbytrista@gmail.com
If you’ve purchased my designs in the past, leave a review. I want to know what you think.
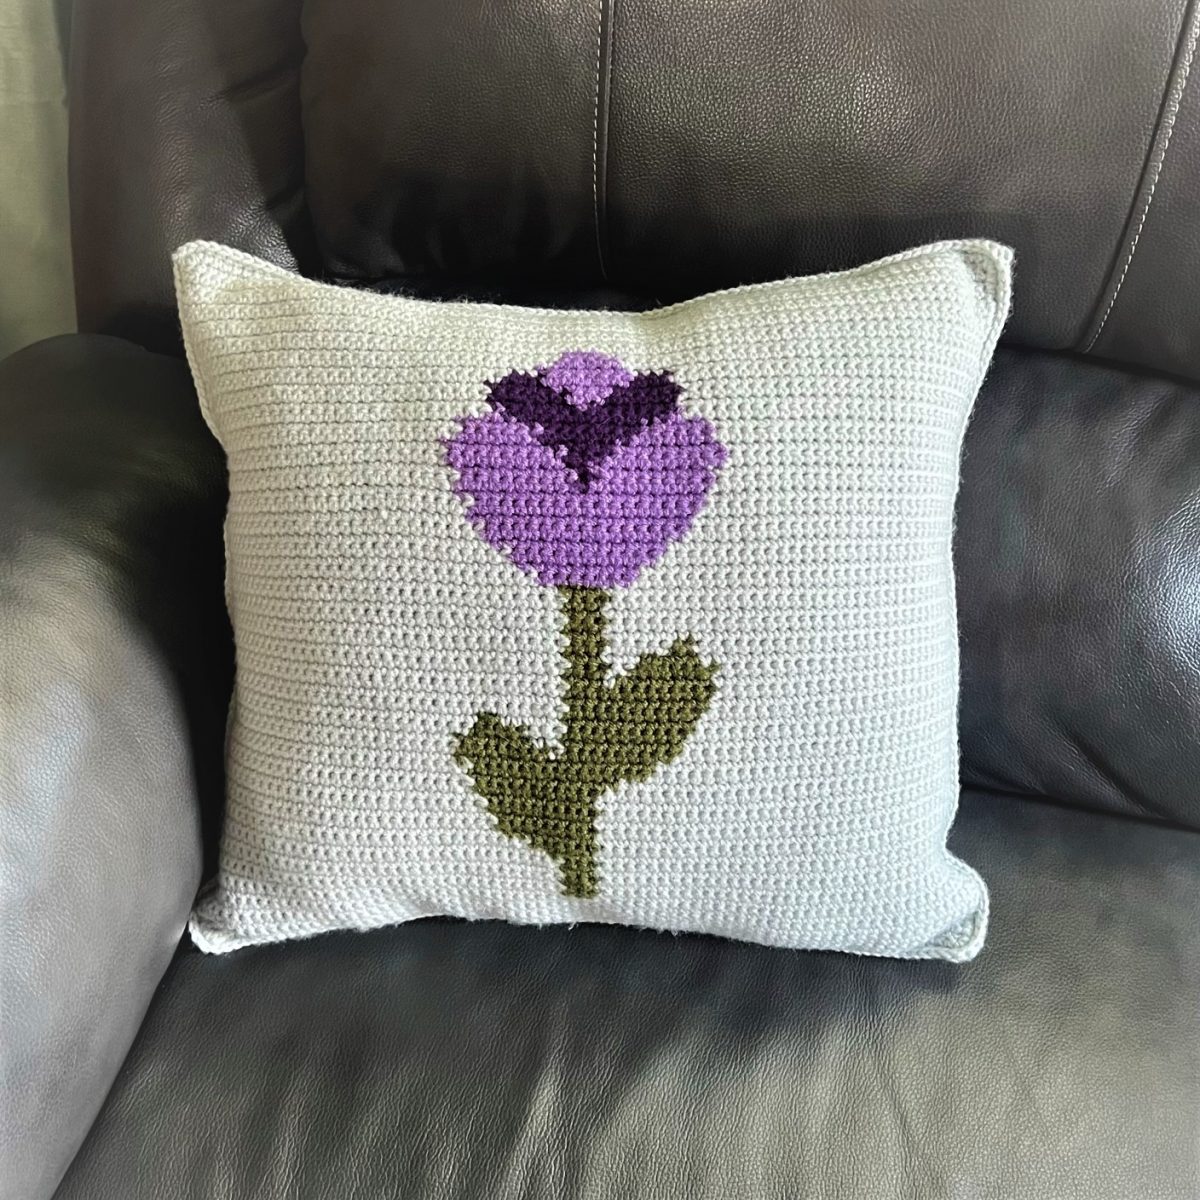
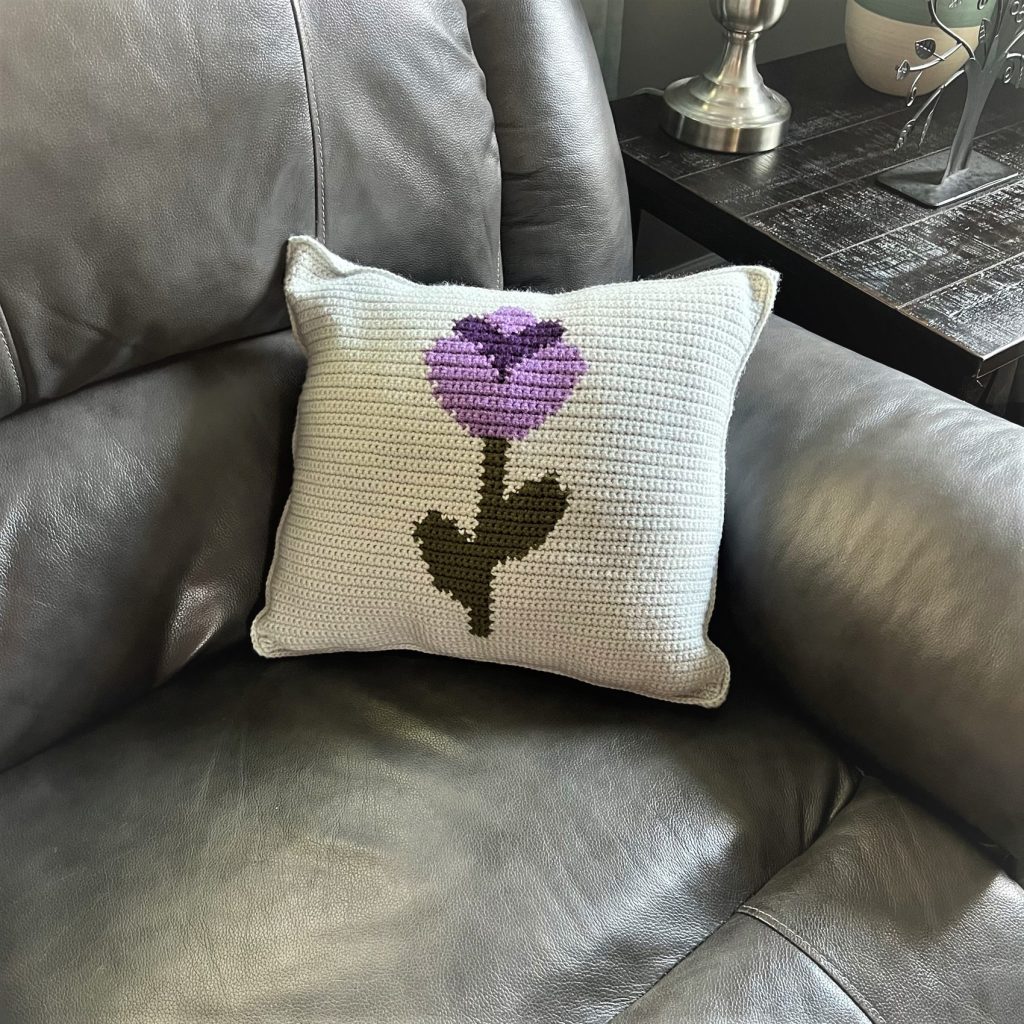
Dream of tulip fields while on the couch or your nice and comfy bed with the Tulip Dreams Pillow. You can easily adjust the petal colors to fit your décor or your favorite colors.
****Post contains affiliate links – which means if you make a purchase from the links below, I will get a small percentage of the sales at no additional cost to you****
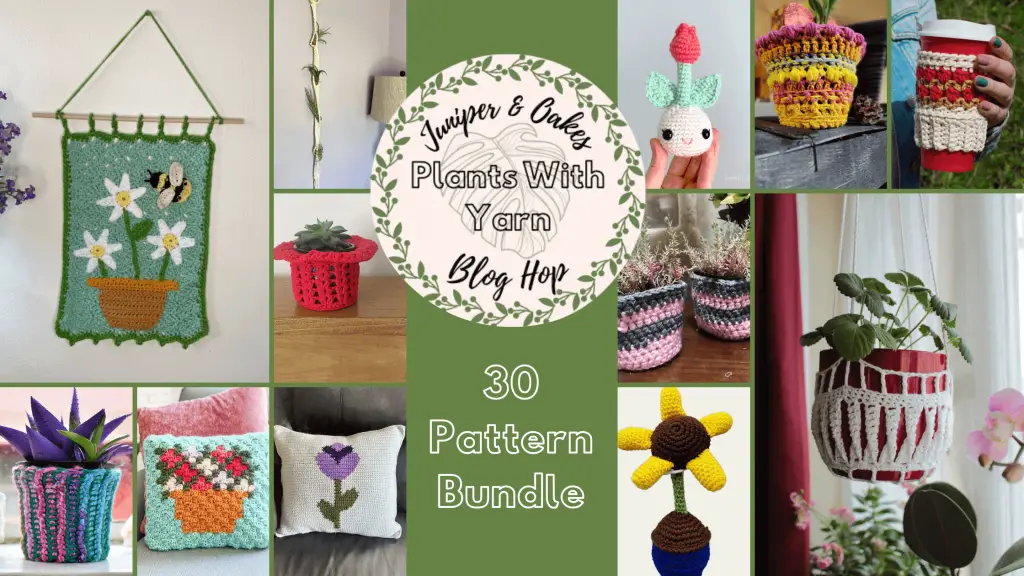
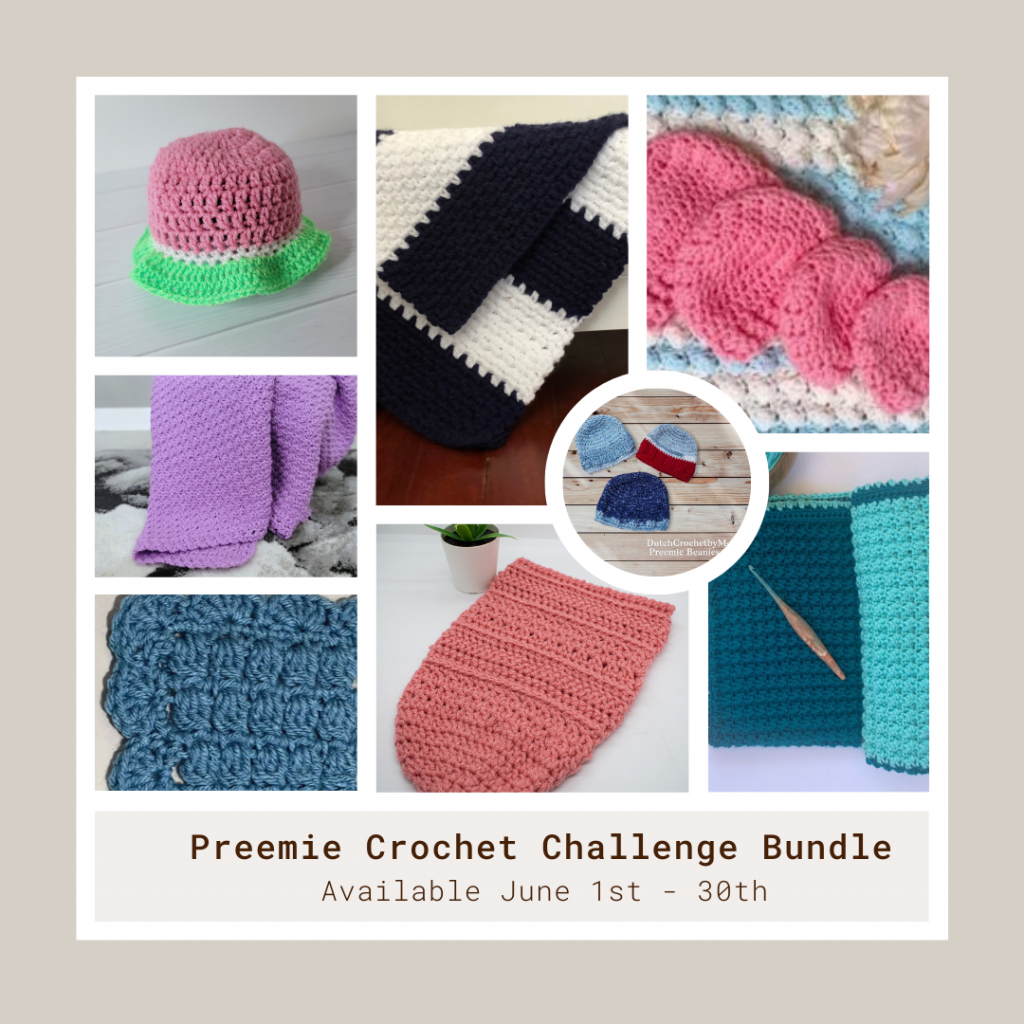
Plants With Yarn Blog Hop
Featured in the Plants With Yarn Blog Hop hosted by Juniper & Oakes. Each day in June 2022 you can download a free pdf of the featured pattern. All the pattern have a plant or flower on them, or can be used with your plants.
Plants With Yarn Pattern Bundle
If you’ve missed some of the past featured patterns or might forget to stop in daily for the daily download, you can purchase the pattern bundle. The Plants With Yarn Pattern Bundle features all 30 patterns that are featured in the event. There might even be a few upgrades that you don’t want to miss out on.
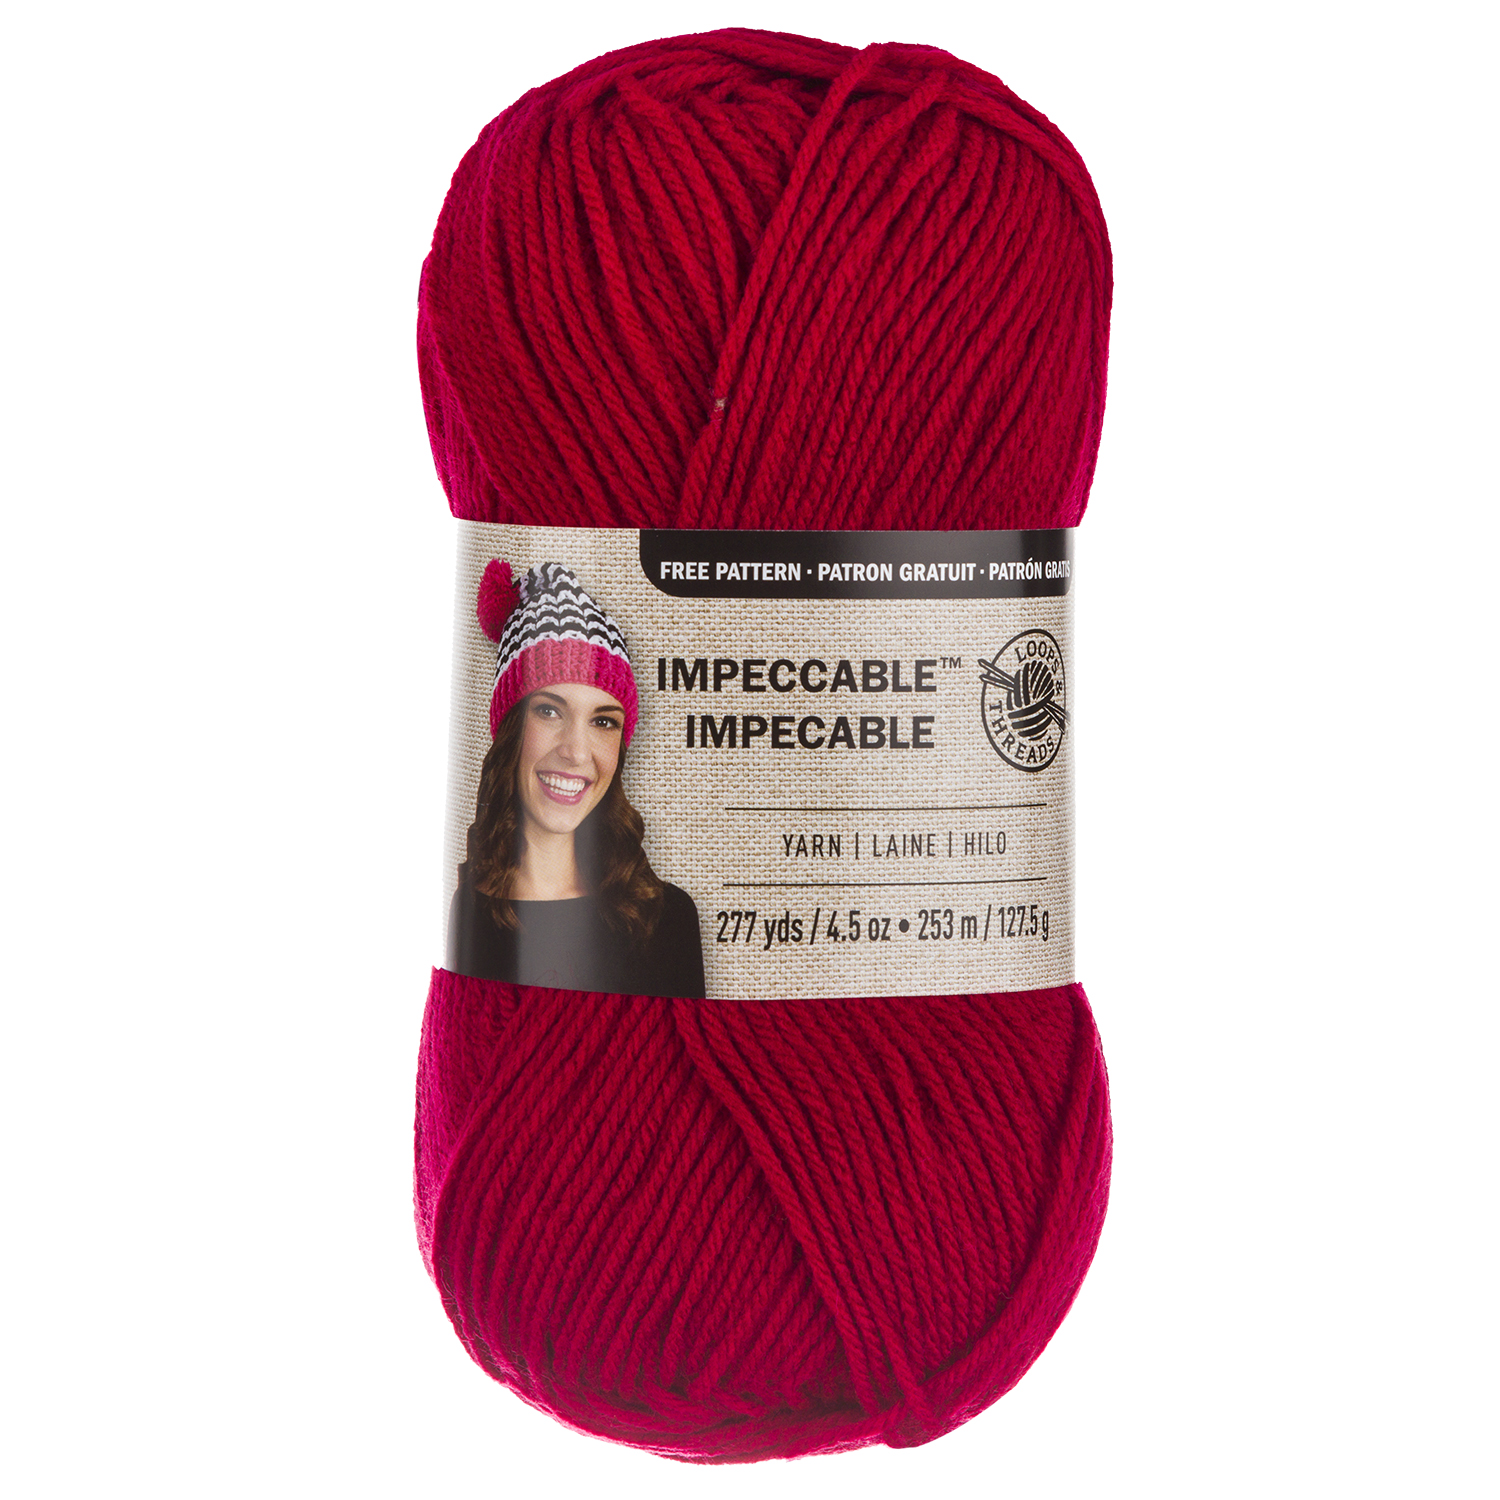
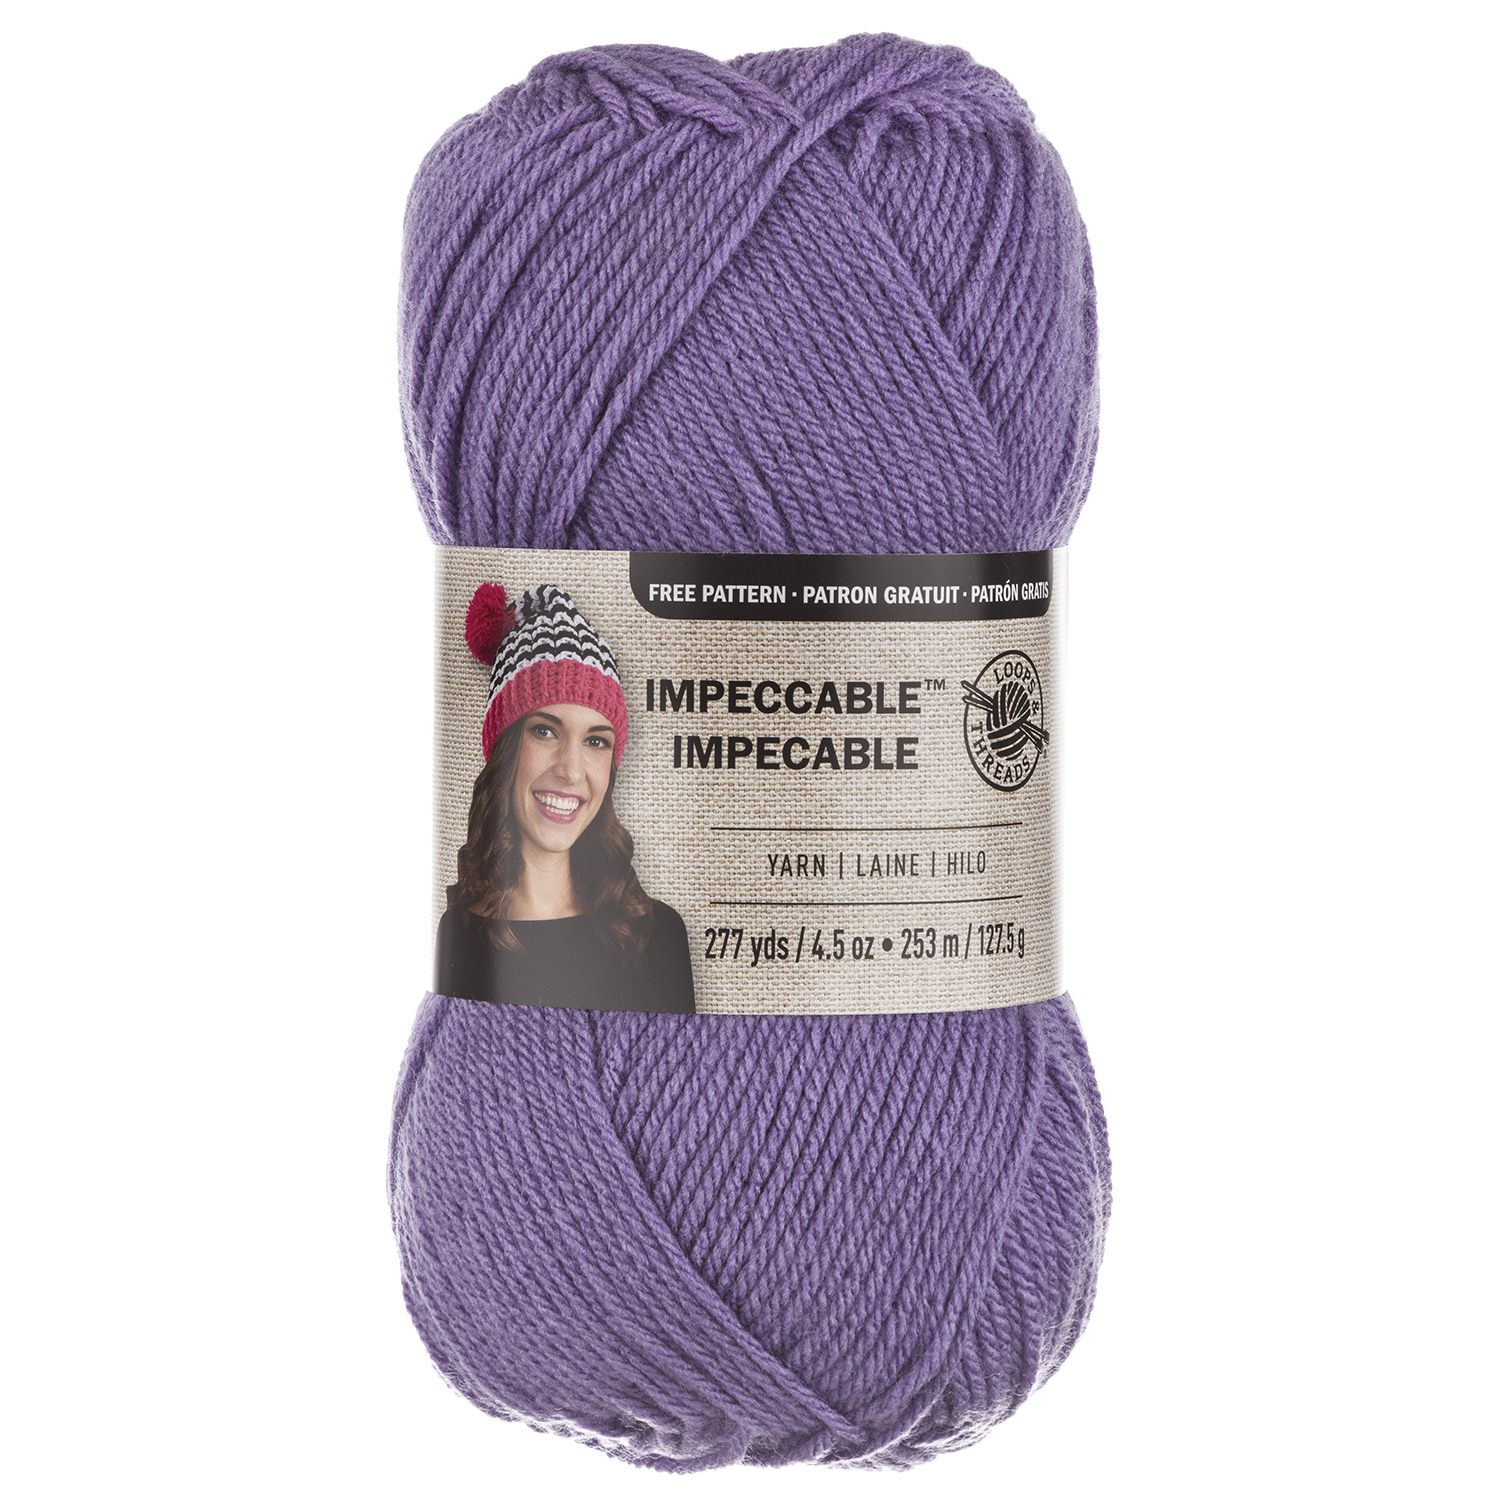
For the Tulip Dreams Pillow I used Loops & Threads Impeccable yarn from Michaels. I found that they had the best variety of colors and is relatively priced.
I’d love to hear from you! Don’t hesitate to contact me. Let me know what you’re working on or designs you’d like to see in the future. Use the links above or email me at crochetsbytrista@gmail.com
If you’ve purchased my designs in the past, leave a review. I want to know what you think.
****Post contains affiliate links – which means if you make a purchase from the links below, I will get a small percentage of the sales at no additional cost to you****
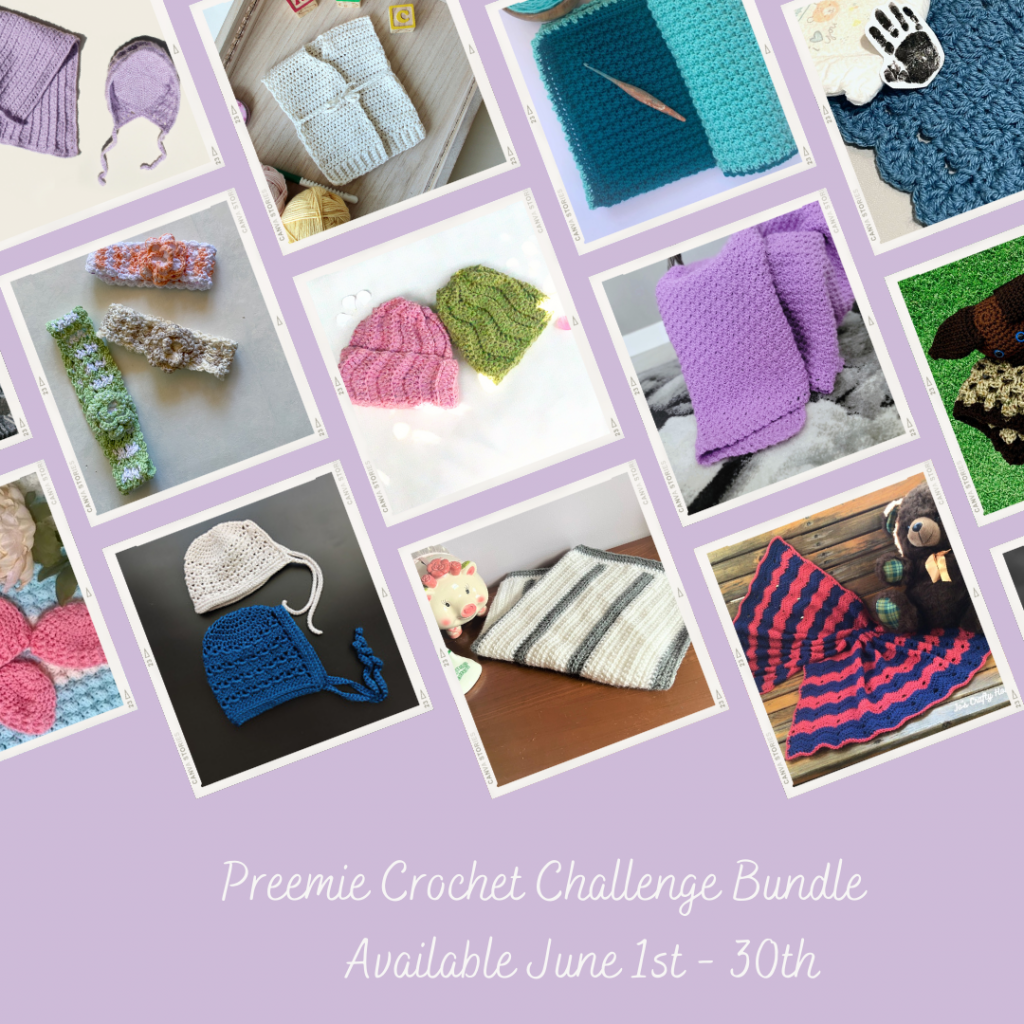
By accepting the free pdf download you are pledging to donate at least one made item from the featured pattern to a Preemie charity / organization / NICU / family of your choosing.
Get all the details about the challenge and other featured patterns HERE.
Preemie Crochet Challenge Pattern Bundle
You can also purchase the Preemie Crochet Challenge Pattern Bundle. The proceeds minus any fees will be donated to Project Sweet Peas and Bliss. You can read more about these charities in the main blog hop post.
Ch – Chain Sc– Single Crochet Hdc – Half Double Crochet Lhdc – Linked Half Double Crochet Sldc – Starting Linked Double Crochet Ldc – Linked Double Crochet Sl St – Slip Stitch St(s) – Stitch(es) MC – Main Color AC – Accent Color
Gauge & Finished Size
Gauge: 15 Stitches x 9 Rows = 4”
Finished Size: 18” wide x 22” tall
Pattern Notes
Written in US crochet terms.
Stitch definitions can be found below.
Approximate yardage used: MC – 225 yards AC – 75 yards
This is a great pattern to use up some of your partially used skeins.
I recommend doing a gauge swatch to get a handle on how do to the stitches correctly.
Stitch Definitions
Sldc – Starting Linked Double Crochet– Ch 2 and insert into the 2nd Ch from the hook. YO and pull up a loop. Insert into the first stitch, YO and pull up a loop (3 loops). YO and pull through two loops, YO and pull through the last two loops.
Ldc – Linked Double Crochet– Insert hook through the horizontal bar of the previous stitch, YO and pull up a loop. Insert hook into the next stitch, YO and pull up a loop. YO and pull through two loops, YO and pull through last two loops.
Lhdc – Linked Half Double Crochet– Insert hook through the bottom leg (bar) of the previous stitch. YO and pull up a loop (2 loops). Insert hook into next stitch, YO and pull up a loop (3 loops), YO and pull through all three loops.
Gauge Swatch
With J Hook
In MC, Ch 16
1.) Sc in 2nd Ch from hook and each Ch across. (15)
2.) Turn, Sldc in 1st St, Ldc in next St and each St across. (15)
3.) Turn, Sldc in 1st St, Ldc in next St and each St across. (15)
4.) Turn, Sldc in 1st St, Ldc in next St and each St across. (15)
5.) Turn, Sldc in 1st St, Ldc in next St and each St across. (15)
6.) Turn, Sldc in 1st St, Ldc in next St and each St across. (15)
7.) Turn, Ch 1, Sc in 1st St and each St across. (15)
8.) With AC, Turn, Ch 1, Hdc in 1st St, Lhdc in next St and each St across. (15)
9.) Turn, Ch 1, Hdc in 1st St, Lhdc in next St and each St across. (15)
Swatch should measuring approximately 4″ by 4″.
The Pattern
With J/6.00mm Hook
In MC, Ch 66
1.) Sc in 2nd Ch from hook and each Ch across. (65)
2.) Turn, Sldc in 1st St, Ldc in next St and each St across. (65)
3.) Turn, Sldc in 1st St, Ldc in next St and each St across. (65)
4.) Turn, Sldc in 1st St, Ldc in next St and each St across. (65)
5.) Turn, Sldc in 1st St, Ldc in next St and each St across. (65)
6.) Turn, Sldc in 1st St, Ldc in next St and each St across. (65)
7.) Turn, Ch 1, Sc in 1st St and each St across. (65)
8.) With AC, turn, Ch 1, Hdc in 1st St, Lhdc in next St and each St across. (65)
9.) Turn, Ch 1, Hdc in 1st St, Lhdc in next St and each St across. (65)
10.) With MC, turn, Ch 1, Sc in 1st St and each St across. (65)
11.) Turn, Sldc in 1st St, Ldc in next St and each St across. (65)
12.) Turn, Sldc in 1st St, Ldc in next St and each St across. (65)
13.) Turn, Sldc in 1st St, Ldc in next St and each St across. (65)
14.) Turn, Sldc in 1st St, Ldc in next St and each St across. (65)
15.) Turn, Sldc in 1st St, Ldc in next St and each St across. (65)
16.) Turn, Ch 1, Sc in 1st St and each St across. (65)
17.) With AC, turn, Ch 1, Hdc in 1st St, Lhdc in next St and each St across. (65)
18.) Turn, Ch 1, Hdc in 1st St, Lhdc in next St and each St across. (65)
19.) With MC, turn, Ch 1, Sc in 1st St and each St across. (65)
20.) Turn, Sldc in 1st St, Ldc in next St and each St across. (65)
21.) Turn, Sldc in 1st St, Ldc in next St and each St across. (65)
22.) Turn, Sldc in 1st St, Ldc in next St and each St across. (65)
23.) Turn, Sldc in 1st St, Ldc in next St and each St across. (65)
24.) Turn, Sldc in 1st St, Ldc in next St and each St across. (65)
25.) Turn, Ch 1, Sc in 1st St and each St across. (65)
26.) With AC, turn, Ch 1, Hdc in 1st St, Lhdc in next St and each St across. (65)
27.) Turn, Ch 1, Hdc in 1st St, Lhdc in next St and each St across. (65)
28.) With MC, turn, Ch 1, Sc in 1st St and each St across. (65)
29.) Turn, Sldc in 1st St, Ldc in next St and each St across. (65)
30.) Turn, Sldc in 1st St, Ldc in next St and each St across. (65)
31.) Turn, Sldc in 1st St, Ldc in next St and each St across. (65)
32.) Turn, Sldc in 1st St, Ldc in next St and each St across. (65)
33.) Turn, Sldc in 1st St, Ldc in next St and each St across. (65)
34.) Turn, Ch 1, Sc in 1st St and each St across. (65)
35.) With AC, turn, Ch 1, Hdc in 1st St, Lhdc in next St and each St across. (65)
36.) Turn, Ch 1, Hdc in 1st St, Lhdc in next St and each St across. (65)
37.) With MC, turn, Ch 1, Sc in 1st St and each St across. (65)
38.) Turn, Sldc in 1st St, Ldc in next St and each St across. (65)
39.) Turn, Sldc in 1st St, Ldc in next St and each St across. (65)
40.) Turn, Sldc in 1st St, Ldc in next St and each St across. (65)
41.) Turn, Sldc in 1st St, Ldc in next St and each St across. (65)
42.) Turn, Sldc in 1st St, Ldc in next St and each St across. (65)
43.) Turn, Ch 1, Sc in 1st St and each St across. (65)
44.) With AC, turn, Ch 1, Hdc in 1st St, Lhdc in next St and each St across. (65)
45.) Turn, Ch 1, Hdc in 1st St, Lhdc in next St and each St across. (65)
46.) With MC, turn, Ch 1, Sc in 1st St and each St across. (65)
47.) Turn, Sldc in 1st St, Ldc in next St and each St across. (65)
48.) Turn, Sldc in 1st St, Ldc in next St and each St across. (65)
49.) Turn, Sldc in 1st St, Ldc in next St and each St across. (65)
50.) Turn, Sldc in 1st St, Ldc in next St and each St across. (65)
51.) Turn, Sldc in 1st St, Ldc in next St and each St across. (65)
52.) Turn, Ch 1, Sc in 1st St and each St across. (65)
Move onto border.
Border
With I/5.00mm Hook
1.) Using MC, Turn, Ch 1, Sc evenly around with 3Sc in the corners. Join with a Sl St to 1st Sc.
2.) Ch 1, Hdc in 1st St, Lhdc in next St and each St around with 3Lhdc in the corners. Join with a Sl St to Lhdc.
3.) Using Ac, Ch 1, Hdc in 1st St, Lhdc in next St and each St around with 3Lhdc in the corners. Join with a Sl St to Lhdc.
4.) Ch 1, Hdc in 1st St, Lhdc in next St and each St around with 3Lhdc in the corners. Join with a Sl St to Lhdc.
Continue round 4 until desired.
Finish off and weave in ends.
Availability
The ad-free pdf download can be purchased on Ravelry and Etsy.
Use the coupon code available HERE as part of the 2022 Preemie Crochet Challenge to get this pdf download for FREE. Again, by accepting the free pdf download you are pledging to donate at least one made item from the featured pattern to a Preemie charity / organization / NICU / family of your choosing.
I’d love to hear from you! Don’t hesitate to contact me. Let me know what you’re working on or designs you’d like to see in the future. Use the links above or email me at crochetsbytrista@gmail.com
If you’ve purchased my designs in the past, leave a review. I want to know what you think.
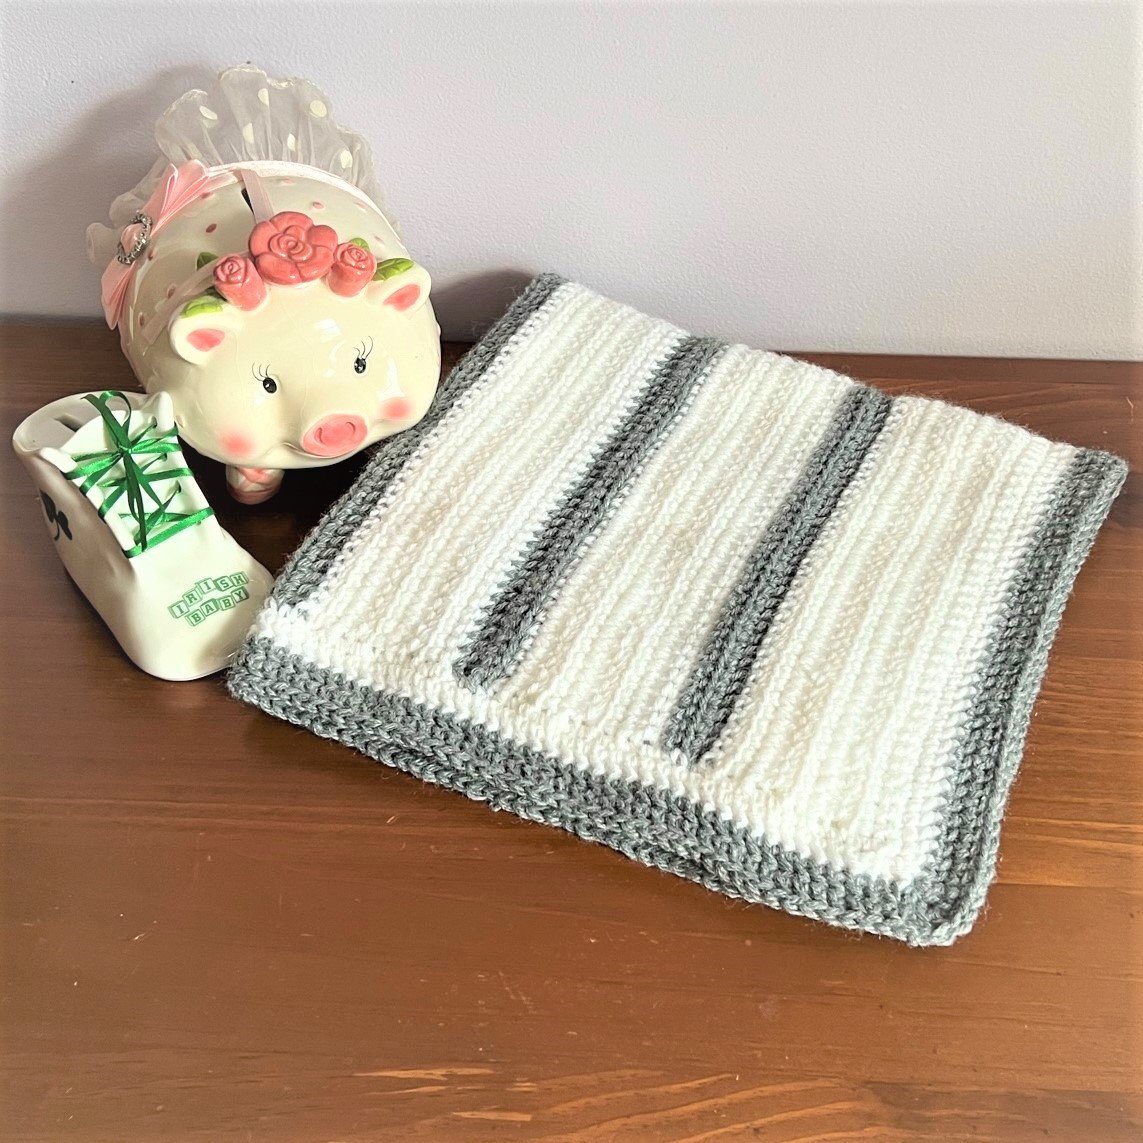
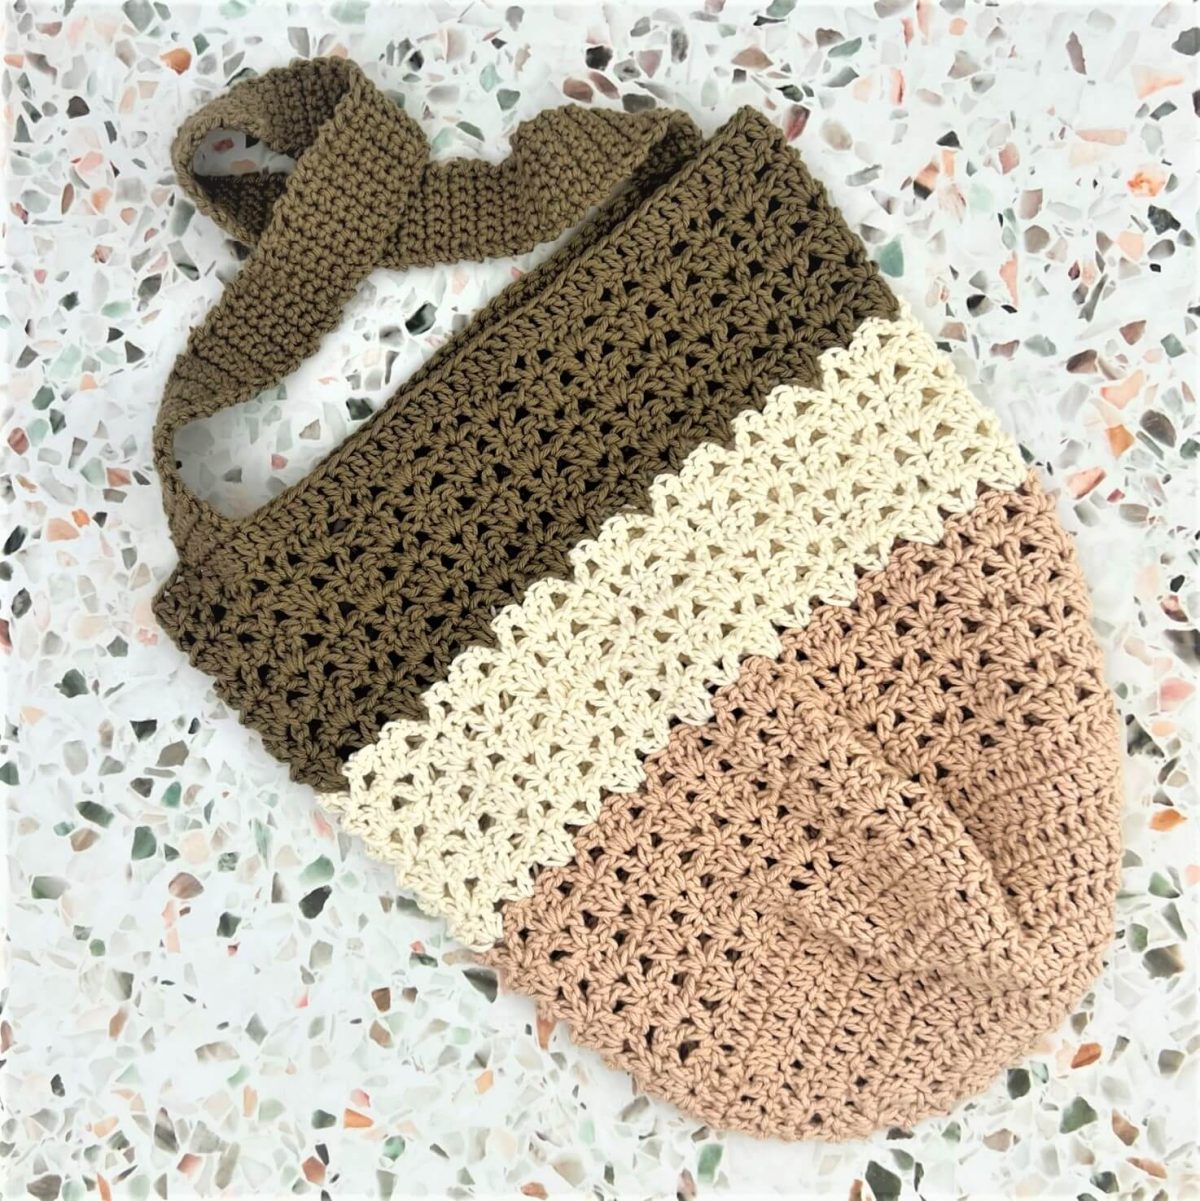
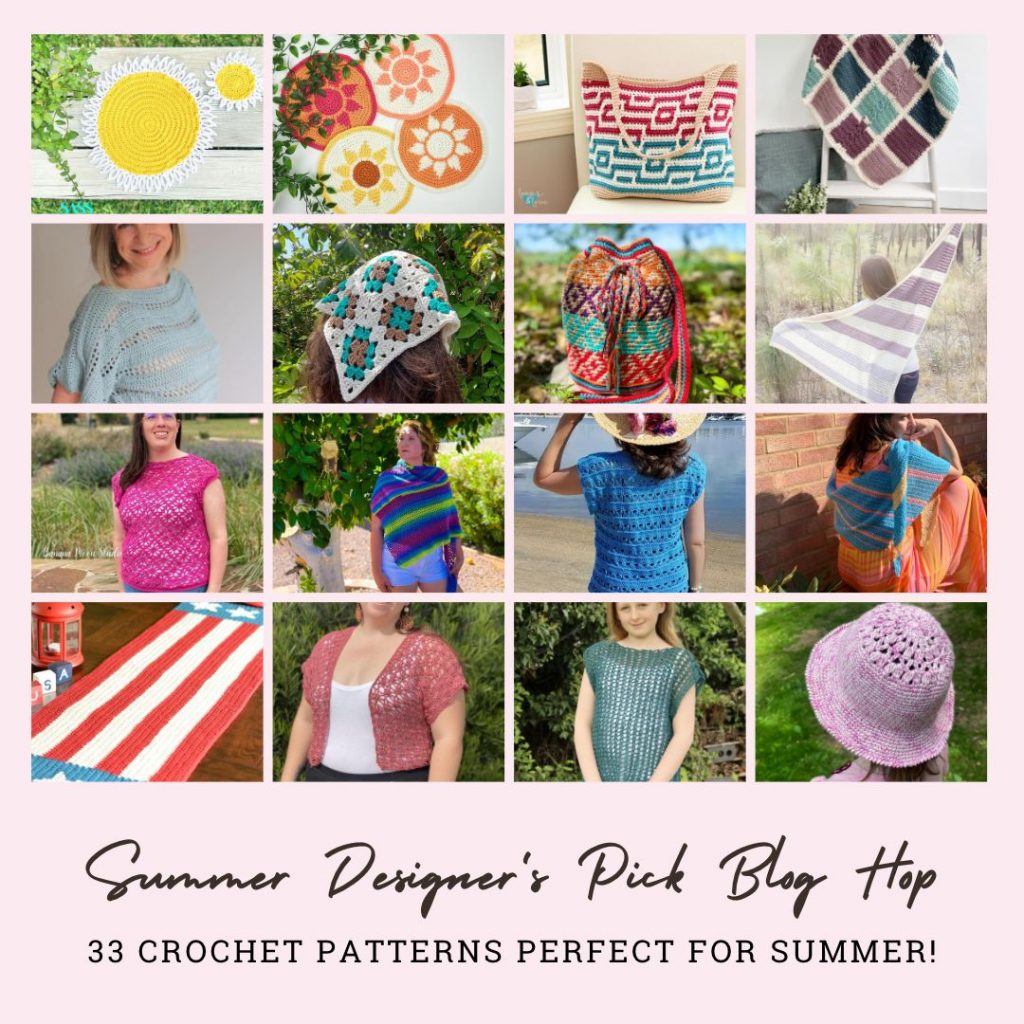
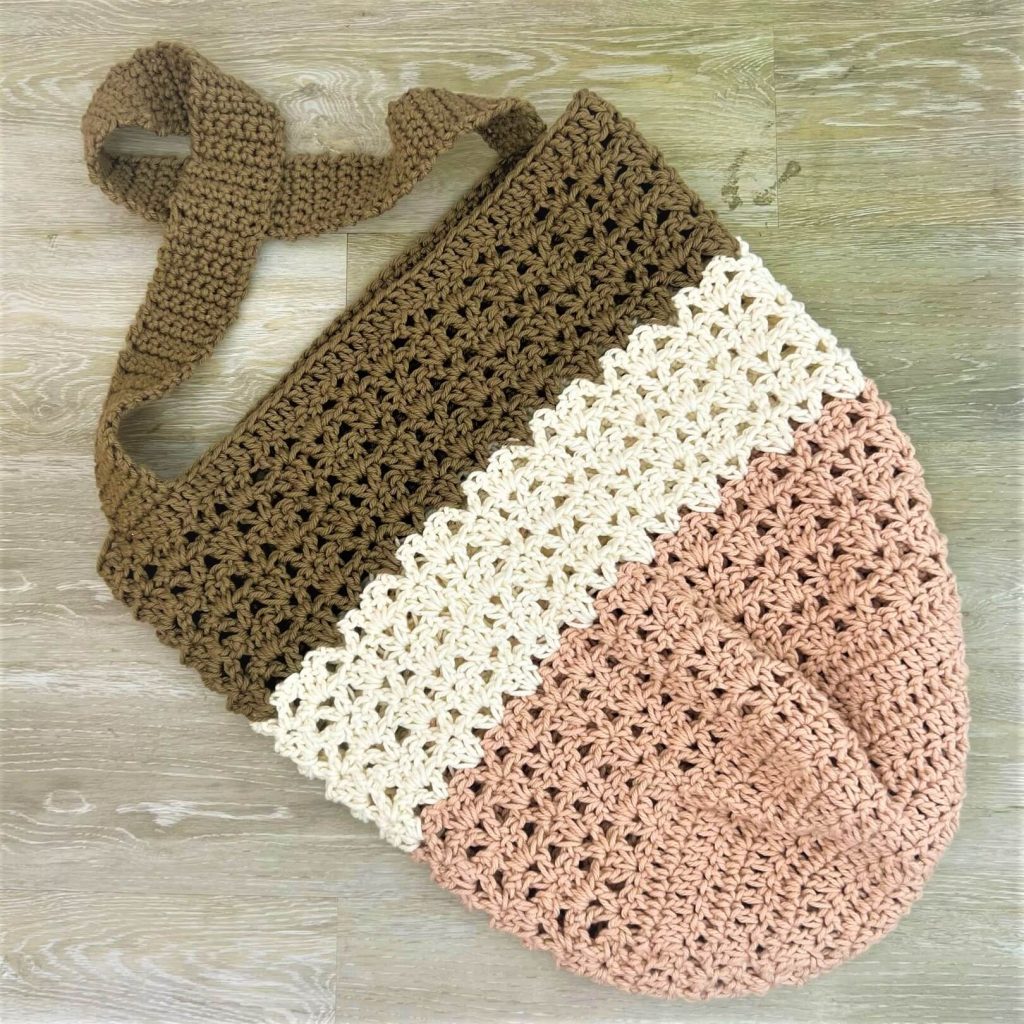
Are you in the market for a new bag pattern? Then you’re going to love the Magnolia Market Tote. This bag is perfect for your trip to the local farmer’s market or a day trip to the lake or beach.
****Post contains affiliate links – which means if you make a purchase from the links below, I will get a small percentage of the sales at no additional cost to you****
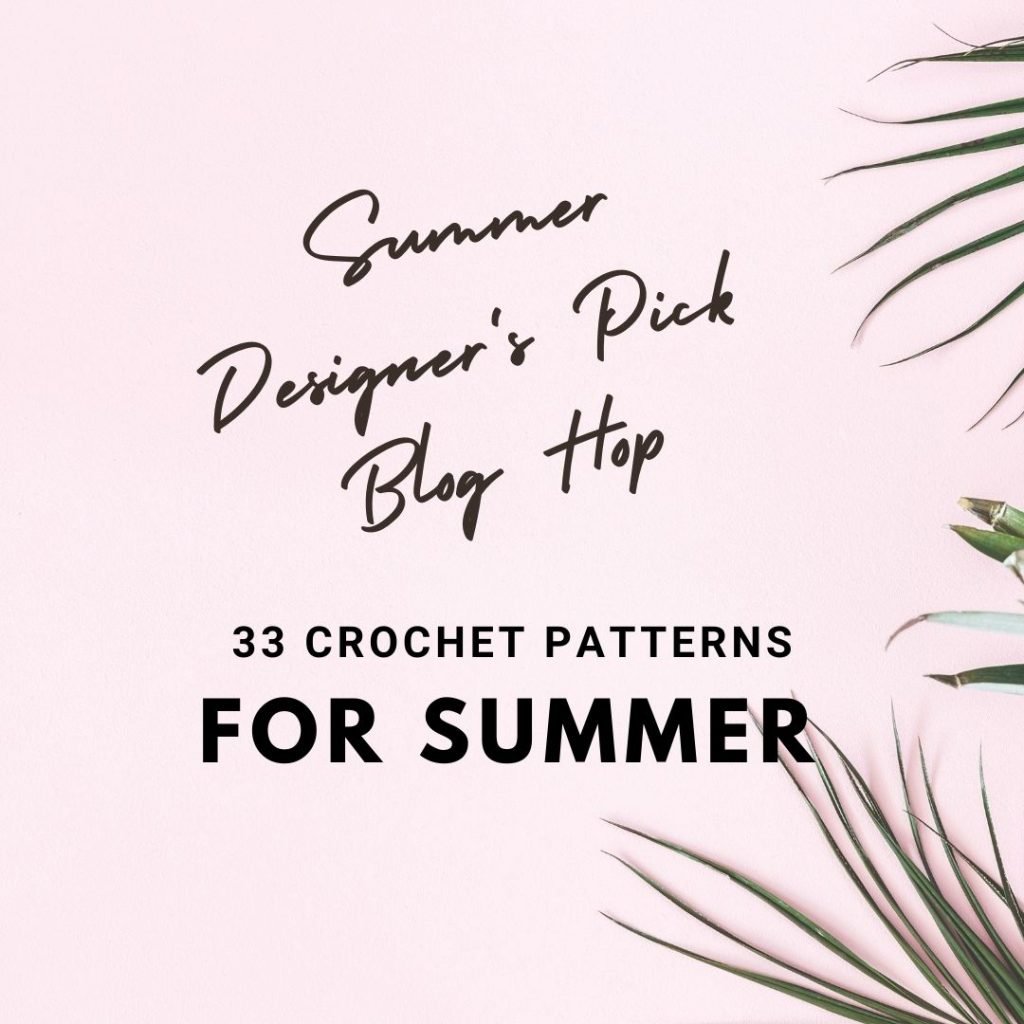
You also have the option to purchase all 33 crochet patterns of the Summer Designer’s Picks for only $12.99! No having to worry about missing one of the featured patterns or having to wait for your favorite one to be released.
There is also an awesome GIVEAWAY during the event! You have the opportunity to win these amazing prizes by just filling out the form below using Rafflecopter. Prizes include a copy of the Summer Designer’s Picks Pattern Bundle and Premium Winding Station Kit provided by WeCrochet.
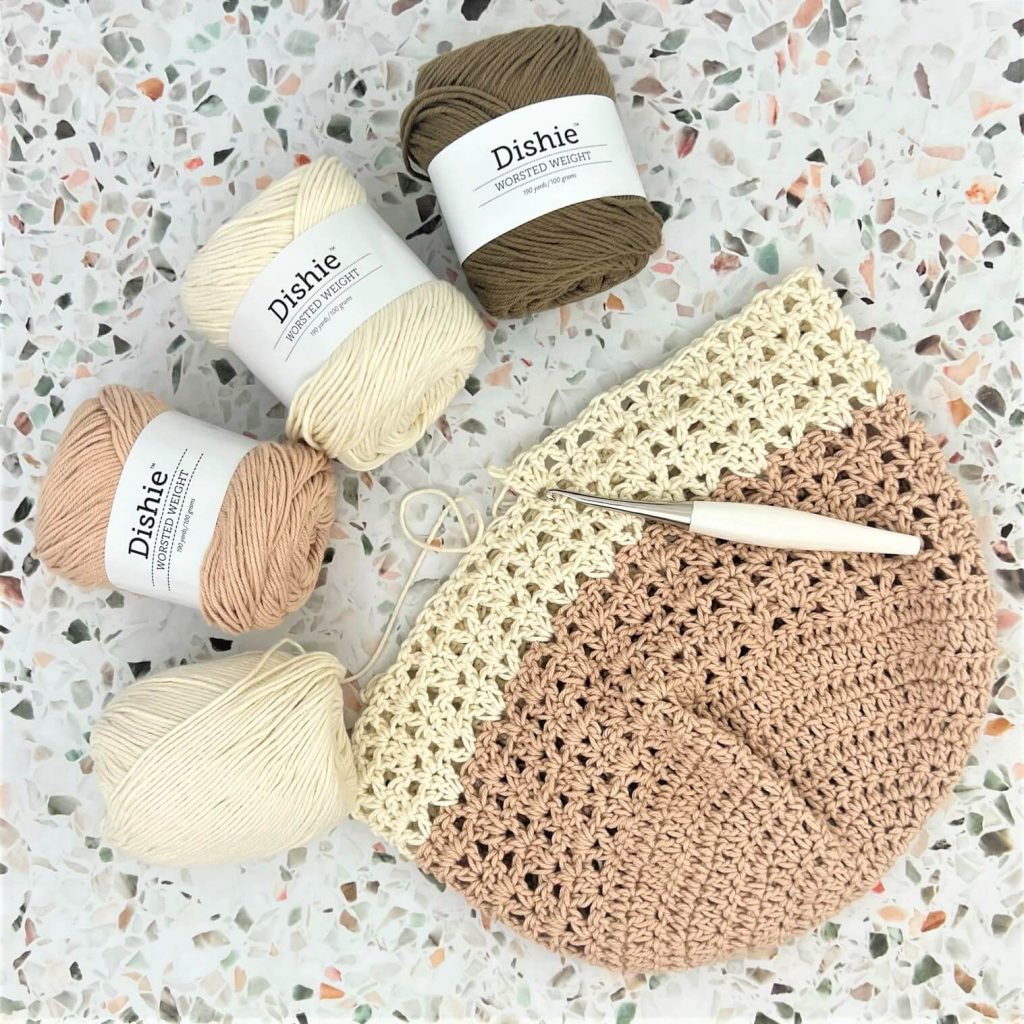
WeCrochet provided the yarn for me to make the Magnolia Market Tote. I decided to use Dishie and I absolutely love this yarn. It is a pleasure to work with and it is my new favorite cotton yarn.
The colorways that I used were Linen (beige), Mushroom (brown), and Swan (white). For the color blocking effect I changed colors every 6 rounds. I was going for a more “earthly” feel with the colors.
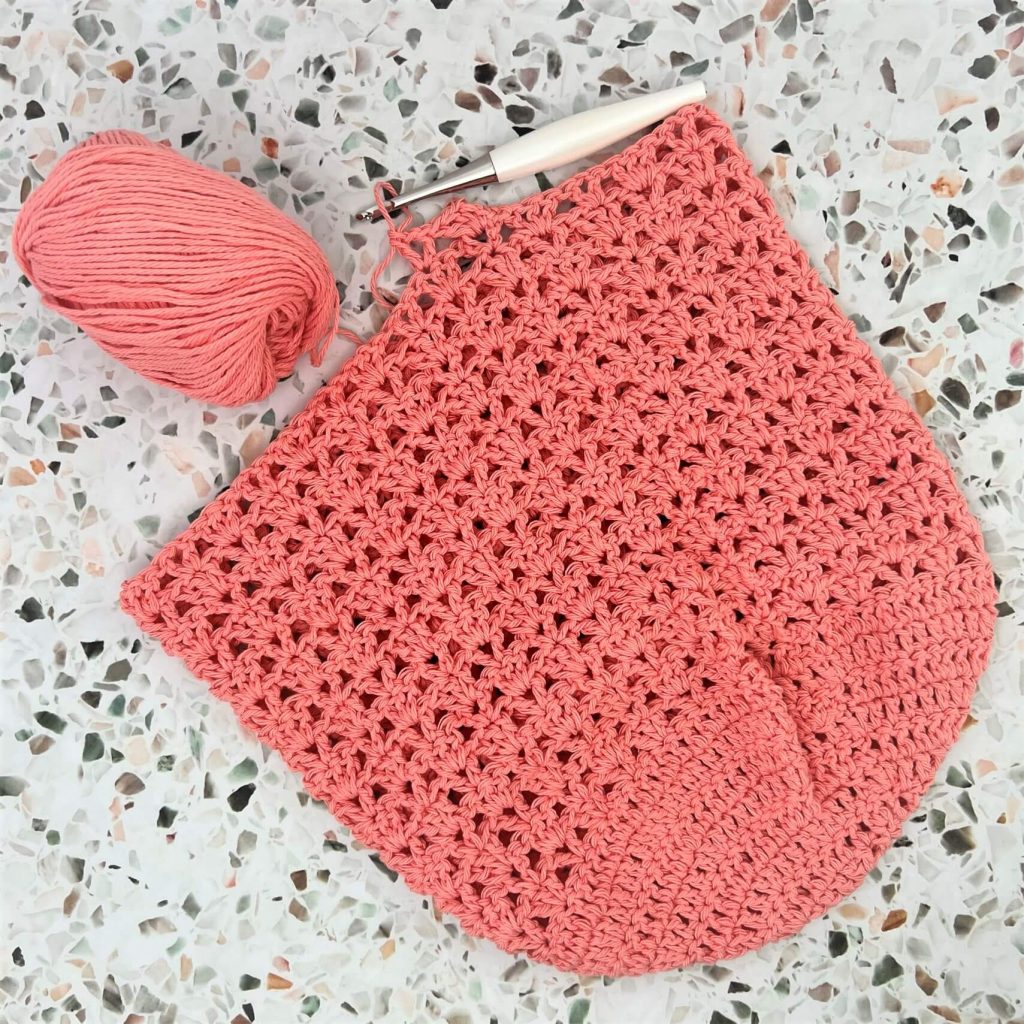
I love the pattern so much but wanted a bright and summer colored bag so I made it again using Lily Sugar ‘n Cream in colorway Tea Rose.
Ch – Chain Dc – Double Crochet MC – Magic Circle RS – Right Side Sc – Single Crochet Sdc – Starting Double Crochet Sk – Skip Sl St – Slip Stitch St(s) – Stitch(es) WS – Wrong Side
Gauge & Finished Size(s)
Gauge: Rounds 1-4 = 4” diameter
Finished Size: 14” tall from bottom, 11” wide across
Pattern Notes
Written in American crochet terms.
The Sdc can be substituted with a Ch 3.
Worked in the round.
Bag height can be adjusted to preference.
Handle length can also be adjusted to desired length.
Each color block is 6 rounds.
Availability
You can purchase the Magnolia Market Tote on Ravelry and Etsy.
I’d love to hear from you! Don’t hesitate to contact me. Let me know what you’re working on or designs you’d like to see in the future. Use the links above or email me at crochetsbytrista@gmail.com
If you’ve purchased my designs in the past, leave a review. I want to know what you think.
This website uses cookies to improve your experience. We'll assume you're ok with this, but you can opt-out if you wish. Cookie settingsACCEPT
Privacy & Cookies Policy
Privacy Overview
This website uses cookies to improve your experience while you navigate through the website. Out of these cookies, the cookies that are categorized as necessary are stored on your browser as they are essential for the working of basic functionalities of the website. We also use third-party cookies that help us analyze and understand how you use this website. These cookies will be stored in your browser only with your consent. You also have the option to opt-out of these cookies. But opting out of some of these cookies may have an effect on your browsing experience.
Necessary cookies are absolutely essential for the website to function properly. This category only includes cookies that ensures basic functionalities and security features of the website. These cookies do not store any personal information.
Any cookies that may not be particularly necessary for the website to function and is used specifically to collect user personal data via analytics, ads, other embedded contents are termed as non-necessary cookies. It is mandatory to procure user consent prior to running these cookies on your website.